Follow these steps to setup the controller and achieve initial motion.
Wiring
Connect the motor leads from your bipolar motor as shown on the label for Mtr 1. The Mtr 1 plug is the lower plug.
Wire a 24 volt power supply to the controller. The power plug is the upper plug. Supply return goes to the GND pin. Positive 24 volts goes to Logic Pwr, Mtr Pwr, and In Common.
Place a loopback cable as shown on the side connector. This satisfies the EStop circuit which is necessary to permit motion.
Apply power to the controller. The green "heartbeat" LED should start blinking after about 3 seconds . The heatbeat LED needs to be blinking before the controller will respond to software. If you encounter a problem the first question support will ask will likely be "Is the heartbeat LED still blinking? Was there any deviation to the blink pattern during the problem?".
Make a Console Button
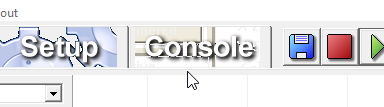
Click the Console Tab
Click the Button Tool
Click inside the default form to create a default sized button or drag a rectangle over the form to create a button of any size.
With the button still selected click on the Legend Editor and change the name to "Move"
Note that the button name field to the left changes to "MoveButton"
Edit the Button Click Procedure
Double click on the button to produce the button property editor:
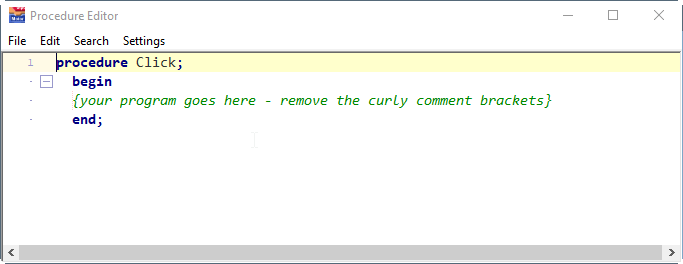
Select "Procedure Click" from the list of Button Events. This is the procedure called when the button is clicked on. This produces a text editor:
Comments start with a left curly bracket, end with a right curly bracket, and are shown in the syntax highlighting editor as green. The comment is indicating where program statements need to be placed. Delete the comment and replace with the following three commands:
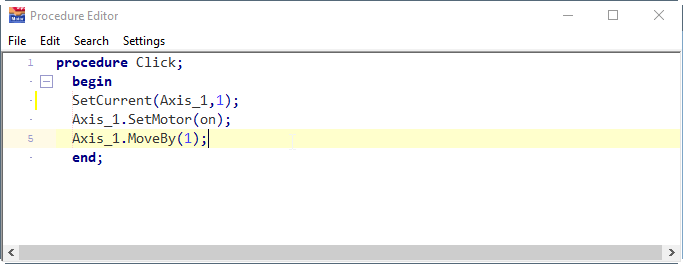
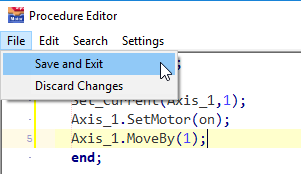
Most commands follow an object oriented syntax where the object, expressed as a noun, starts the statement followed by a period followed by a method name as a verb and any additional parameters. Some commands are procedural and begin with the procedure name followed by parameters. In this example the SetCurrent command is the procedural style and the remaining motion commands are in the object oriented style. Select "File | Save and Exit"
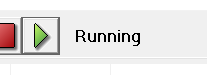
Click the "Play" button and wait for the status to indicate "Running":
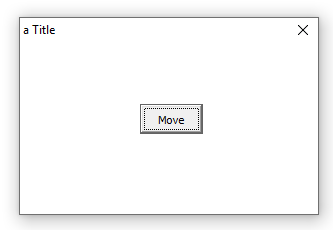
If there is an error in a command there will be an indication of the error and the editor will try to put the cursor close to the error. Correct the error, File Save and Exit again, and press the "Play" button again. A small windows form should be provided displaying the Move button:
Click on the Move button and the motor should turn one rotation